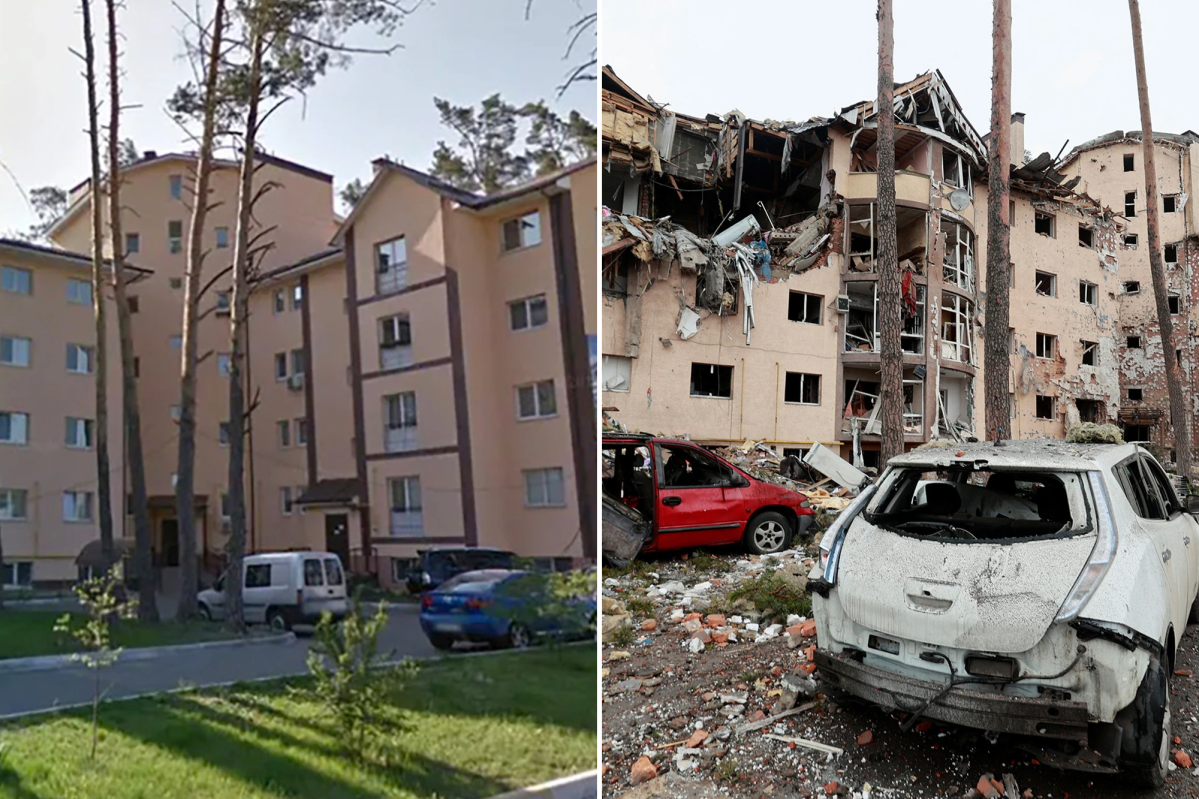
Destroyed city or abandoned cities offer a haunting beauty that can tell stories of decay, resilience, and history. Whether you’re drawn to the post-apocalyptic aesthetics or the raw textures of urban ruins, photographing these environments requires thorough preparation and a creative eye. In this guide, we walk you through everything—from planning and safety to equipment, techniques, and post‐processing—to help you capture unforgettable images in these extraordinary settings.
Pre-Visit Research and Planning
Understand the History
Before setting foot in a ruined city, spend time researching its background. Understanding the history behind the location not only adds context to your photos but also informs you of any sensitive issues related to the site. Look for articles, documentaries, and online photo essays that detail the reasons behind the destruction, whether from natural disasters, wars, or economic decline.
Legal Permissions and Local Guidance
Destroyed city are not always public property. Some sites may require special permits or have restricted access. Contact local authorities or tour operators for guidance. This step is crucial not only for legal reasons but also to ensure your safety and respect for the area’s history.
Mapping and Scouting
Use mapping tools and satellite imagery to get a sense of the layout. Identify key areas of interest such as collapsed structures, graffiti-tagged walls, and overgrown paths. If possible, connect with local photographers or guides who can share insider tips about which locations are most photogenic—and safe—to explore.
Time of Visit
Plan your visit around the best natural lighting conditions. Early mornings and late afternoons (the golden hours) provide soft, warm light that enhances textures and adds dramatic shadows. Overcast days, on the other hand, can help reduce harsh contrasts, allowing finer details to emerge in your shots.
Safety and Ethical Considerations
Personal Safety First
Destroyed cities can be dangerous due to unstable structures, hidden debris, and environmental hazards. Always prioritize your safety:
- Wear Protective Gear: Sturdy boots, gloves, and a hard hat are essential. Consider a dust mask if the area is particularly dusty.
- Travel in a Group: Never venture alone. Bring a partner or hire a local guide who knows the terrain.
- Inform Others: Let someone know your itinerary and expected return time.
Respect the Site
These sites often carry deep emotional and historical significance. Avoid disturbing the environment or taking souvenirs that could erase important traces of history. Maintain a respectful distance from sensitive areas and ask for permission before photographing people or private property. Ethical photography in these settings means capturing the story without exploiting tragedy.
Insurance and Emergency Planning
Consider travel insurance that covers accidents in hazardous environments. Have a first-aid kit on hand, and know the location of the nearest medical facility. In unstable structures, always test floors and surfaces before stepping on them.
Gear and Technical Setup
Choosing the Right Camera and Lenses
A high-quality DSLR or mirrorless camera is ideal, giving you full control over settings like aperture, shutter speed, and ISO. For wide, expansive scenes, a wide-angle lens is essential; it allows you to capture the breadth of the decay and the environment. For detailed close-ups of textures such as rust, peeling paint, or shattered glass, consider a macro lens.
Essential Accessories
- Tripod: A sturdy tripod is invaluable for low-light situations and long exposures, which are common when shooting in the soft light of early mornings or evenings.
- Filters: A polarizing filter can reduce glare and enhance colors, while neutral density (ND) filters allow for creative long-exposure shots even in bright daylight.
- Extra Batteries and Memory Cards: In challenging environments, you might not have easy access to power. Carry extras to ensure you don’t miss a shot.
- Protective Bags: Use waterproof and shockproof bags to safeguard your equipment from dust, moisture, and rough handling.
Using Modern Tech
Drones can offer unique aerial perspectives of destroyed cities, revealing patterns and landscapes that are impossible to capture from the ground. Ensure you follow local drone regulations and have proper permits before flying.
Composition and Shooting Techniques
Finding Unique Angles
Destroyed cities are full of textures, patterns, and contrasts. Experiment with different angles:
- Low Angles: Get close to the ground to highlight details like cracks, overgrowth, or litter. Low-angle shots can give a sense of scale and isolation.
- High Angles: Use a drone or find elevated spots to capture the full extent of the decay. High-angle shots can show how nature reclaims urban space.
- Reflections and Silhouettes: Use puddles, broken windows, or even the light passing through gaps to create striking reflections. Silhouettes against a dramatic sky can also emphasize the stark reality of the ruins.
Lighting and Exposure
Destroyed cities often offer challenging lighting conditions:
- Golden Hour: The warm, directional light during sunrise or sunset can cast dramatic shadows and highlight the textures of decay.
- Overcast Conditions: On cloudy days, the diffused light can bring out details without harsh shadows. Experiment with high dynamic range (HDR) techniques to balance the exposure between the bright sky and darker ruins.
- Long Exposures: In areas with low light, long exposures can capture movement, like drifting dust or the swaying of overgrown vegetation, adding an ethereal quality to your images.
Creative Techniques
- Depth of Field: Use a narrow aperture (high f-stop) to ensure most of the scene is in focus. This is especially useful when capturing the vastness of a ruined cityscape.
- Motion Blur: Experiment with slow shutter speeds to create motion blur in elements like moving clouds or rustling leaves, emphasizing the passage of time.
- Black and White: Converting images to black and white can enhance the mood and draw attention to textures and contrasts, stripping away the distraction of color.
Post-Processing and Storytelling
Editing Software
Use professional editing software such as Adobe Lightroom or Photoshop to enhance your images. Adjust exposure, contrast, and clarity to bring out the textures of decay. Be mindful of not over-processing; the goal is to enhance the natural beauty of the ruined environment.
Emphasizing Texture and Tone
- Clarity and Sharpness: Increasing clarity and sharpness can highlight intricate details like cracks and weathered surfaces.
- Color Grading: Adjust the color tones to evoke the right mood. A cooler tone might emphasize loneliness and desolation, while warmer hues can add a nostalgic feel.
- Cropping and Framing: Experiment with cropping to focus on the most compelling elements of your shot. A well-framed image tells a story without distractions.
Creating a Narrative
Your images should tell a story about the past and present. Consider creating a series of photos that take the viewer on a journey through the ruined city. The narrative can be enhanced by pairing photos with brief captions or a short written piece that explains the history and transformation of the space.
Final Thoughts and Best Practices
Continuous Learning
Urban decay photography is as much about technical skill as it is about storytelling. Regularly review your work, seek feedback, and study the work of other photographers who specialize in this genre. Online communities and workshops can be invaluable for improving your craft.
Ethical Storytelling
Always remember that behind every ruined building lies a history of human experience. Approach your subjects with empathy and respect. Your photographs should honor the memory of what once was while capturing the stark beauty of decay.
Sharing Your Work
Once you’ve created your images, consider how best to share them. Social media platforms, photography blogs, and exhibitions are great venues for reaching an audience. Accompany your work with thoughtful narratives that provide context and respect for the sites you’ve captured.
Conclusion
Photographing destroyed city is a challenging yet deeply rewarding endeavor. These environments, filled with remnants of history and the slow reclaiming force of nature, offer a visual narrative that speaks of impermanence and resilience. By carefully planning your visit, prioritizing safety and ethics, and employing creative techniques and proper gear, you can capture stunning photographs that transcend mere documentation to become powerful works of art.
Remember that the essence of urban decay lies in its raw, unfiltered reality. Whether you’re capturing the crumbling façade of a once-thriving neighborhood or the delicate interplay of light and shadow on a broken wall, your work should reflect both the beauty and the sorrow inherent in these sites. With patience, creativity, and a respectful approach, your photos can serve as a poignant reminder of the transient nature of our built environment.
Embrace the challenge and allow the stories of destroyed cities to inspire your art. Every crack, every layer of peeling paint, and every forgotten doorway holds a story waiting to be told—stories that, when captured with care, can resonate with viewers on a profoundly emotional level.
Happy shooting, and may your lens capture the haunting elegance of decay in all its stark, unforgettable beauty.


